
Install the Edge Agent
Bring a site online — install the URUFI Edge Agent on a Linux gateway with systemd, nftables and IP forwarding.
The Edge Agent is a DHCP server, NAT gateway, firewall and RADIUS/EAP-TLS authenticator in one static binary. It runs natively on the site's gateway box and dials home to the Manager over an outbound TLS connection — so a site behind NAT needs no public IP and no inbound firewall rules.
There are two ways to install it: the automatic installer (recommended) or a manual setup.
1. The box must be the gateway
The agent hands out DHCP leases and enforces the walled garden, so it must sit inline as the site's gateway with two interfaces:
Internet ─ [ISP modem] ─ WAN(eth0) ─ [ EDGE BOX · urufi-agent ] ─ LAN(eth1) ─ switch ─ WiFi APs
(Open + Secure SSID)- LAN — the DHCP interface. Clients get their lease here and the captive redirect fires here.
- WAN — the uplink, masqueraded out.
- Access points are dumb bridges broadcasting the SSIDs. For the secure SSID they point RADIUS at the agent's LAN IP.
Hardware. A small 2-NIC mini-PC (for example an Intel N100 with dual LAN) running Debian or Ubuntu is plenty for one site.
Enforcement requires the gateway position
The agent only enforces access where it is the clients' default gateway — on real router/AP hardware or host networking, not a bridged container.
2. Get the files
Sign in to the Network Operations Console → Agents and Download agent to get the
urufi-agent binary — a static x86-64 Linux build with no dependencies.
The install.sh script ships with your URUFI deployment (deployment/install.sh); it's
generic and doesn't change between agent versions. Copy both to the edge box.
3. Install
Option A — Automatic (recommended)
Copy install.sh and the urufi-agent binary to the box (side by side) and run:
sudo ./install.shThe installer does everything the agent needs on a fresh Linux box:
- installs
nftablesandca-certificates, - enables IPv4 forwarding (
/etc/sysctl.d/99-urufi.conf), - installs the binary to
/usr/local/bin/urufi-agent, - creates
/etc/urufi/agent/for configuration, - installs and reloads the systemd unit.
It does not start the agent — you register and configure it first (steps 4–6).
Install from a URL instead
If you host the binary, skip copying it and point the installer at the download:
sudo AGENT_BINARY_URL=https://…/urufi-agent ./install.sh.
Option B — Manual
If you'd rather not use the installer, do the same steps by hand.
# 1. Dependencies
sudo apt-get install -y nftables ca-certificates   # or: dnf / apk

# 2. Enable IPv4 forwarding (the agent is the NAT gateway)
echo 'net.ipv4.ip_forward = 1' | sudo tee /etc/sysctl.d/99-urufi.conf
sudo sysctl -p /etc/sysctl.d/99-urufi.conf

# 3. Install the binary
sudo install -m 0755 urufi-agent /usr/local/bin/urufi-agent

# 4. Configuration directory
sudo mkdir -p /etc/urufi/agent && sudo chmod 750 /etc/urufi/agent
Then create the systemd unit below and run sudo systemctl daemon-reload.
The systemd unit
Both options install this unit. It runs the agent with only the capabilities it needs (raw DHCP sockets, nftables, the privileged RADIUS port) and sandboxes everything else:
# /etc/systemd/system/urufi-agent.service
[Unit]
Description=URUFI Edge Agent (DHCP · RADIUS/EAP-TLS · firewall)
Documentation=https://urufi.net/docs
After=network-online.target nftables.service
Wants=network-online.target

[Service]
Type=simple
ExecStart=/usr/local/bin/urufi-agent
Restart=on-failure
RestartSec=3

# Only the capabilities the agent actually needs
AmbientCapabilities=CAP_NET_ADMIN CAP_NET_RAW CAP_NET_BIND_SERVICE
CapabilityBoundingSet=CAP_NET_ADMIN CAP_NET_RAW CAP_NET_BIND_SERVICE
NoNewPrivileges=true

# Sandboxing
ProtectSystem=strict
ProtectHome=true
PrivateTmp=true
ReadWritePaths=/etc/urufi/agent
ProtectKernelTunables=true
ProtectControlGroups=true
RestrictAddressFamilies=AF_INET AF_INET6 AF_NETLINK AF_PACKET

[Install]
WantedBy=multi-user.target
The agent finds /etc/urufi/agent/config.yaml automatically — no working directory or
arguments required.
4. Register the agent in the NOC
In the Network Operations Console → Agents, add an agent for the site. Open its detail panel and copy the Agent ID and Auth Key — the first-run wizard needs both. This is also where you later toggle the agent's services and restart it.
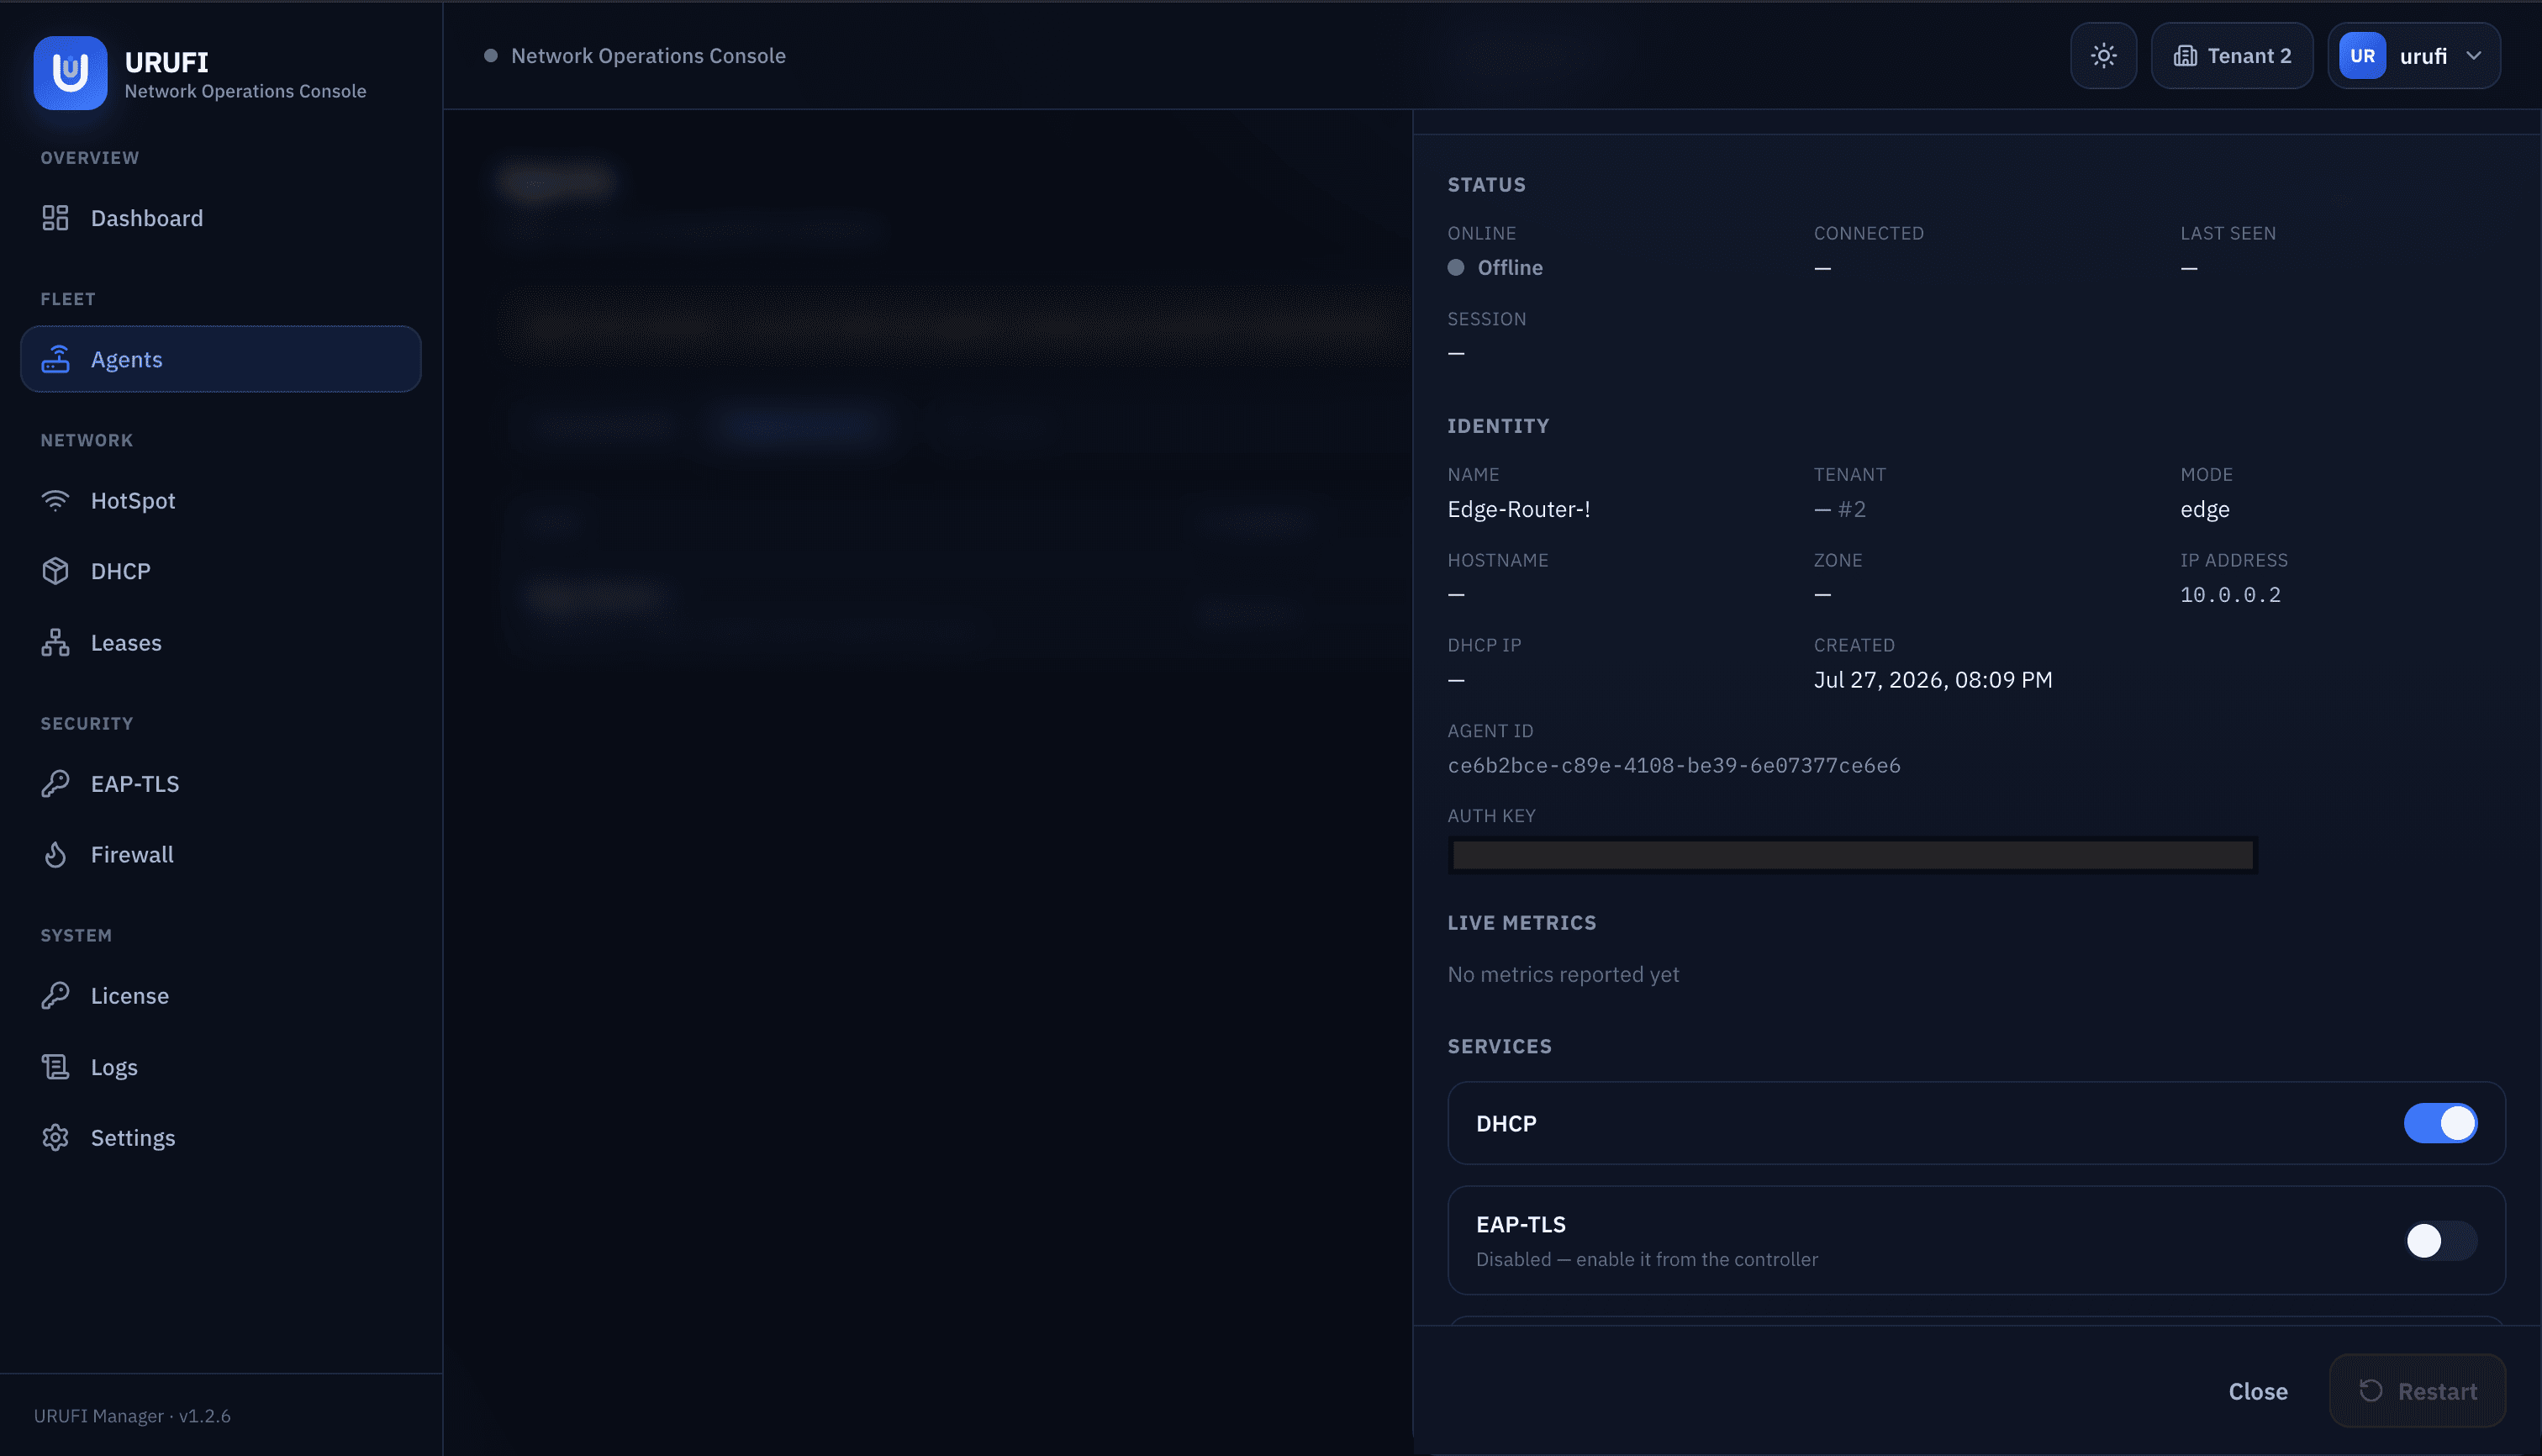
The Auth Key is a secret
Treat the Agent ID and Auth Key like credentials. Copy them straight into the wizard and don't share them.
5. First-run setup
Copy the Manager's CA certificate to the box (needed for the TLS link):
scp you@manager:/path/to/ca.pem /etc/urufi/agent/manager-ca.pemThen run the first-run wizard, which writes /etc/urufi/agent/config.yaml:
sudo urufi-agent initial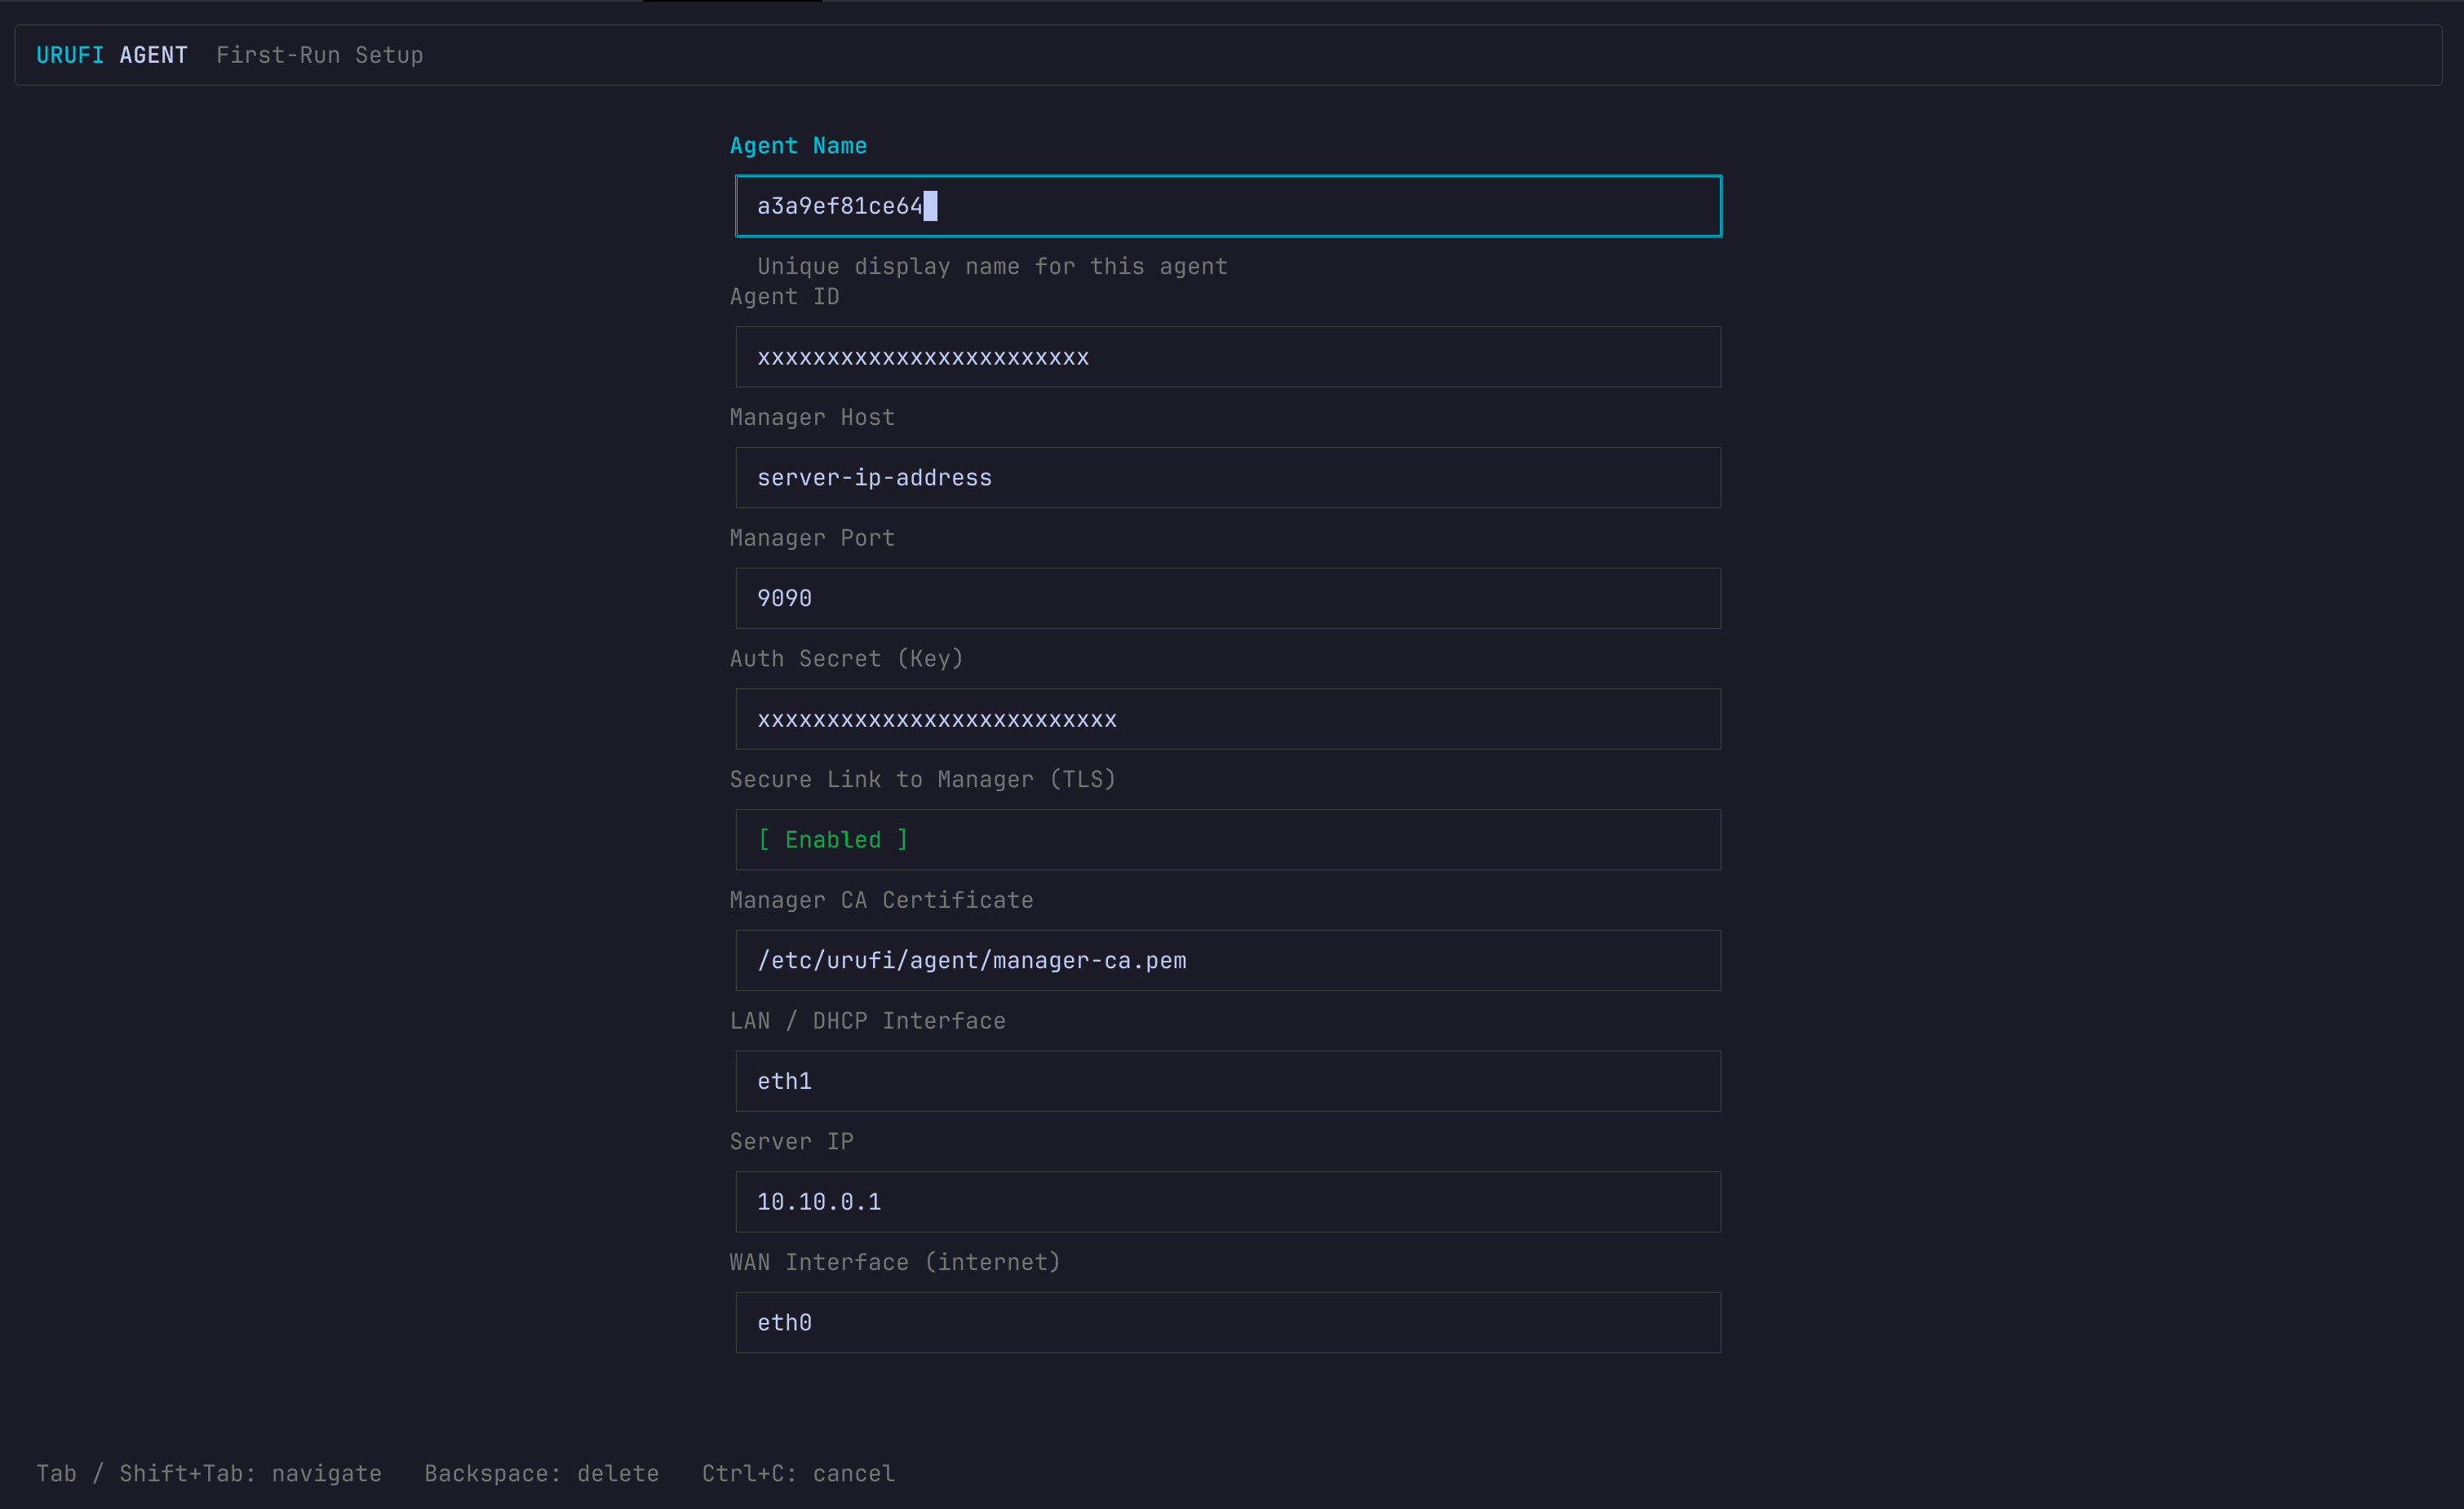
Fill each field (use Tab / Shift+Tab to move, Backspace to edit, Space to toggle TLS):
| Field | What to enter |
|---|---|
| Agent Name | A display name for this agent (shown in the NOC) |
| Agent ID | Paste from the NOC |
| Manager Host | The Manager's IP or domain — must match the server certificate |
| Manager Port | 9090 |
| Auth Secret (Key) | Paste the Auth Key from the NOC |
| Secure Link to Manager (TLS) | Enabled |
| Manager CA Certificate | /etc/urufi/agent/manager-ca.pem |
| LAN / DHCP Interface | The LAN NIC, e.g. eth1 |
| Server IP | The agent's LAN IP, e.g. 10.10.0.1 |
| WAN Interface (internet) | The uplink NIC, e.g. eth0 |
The wizard produces a config like this:
# /etc/urufi/agent/config.yaml
agent:
  id: "…Agent ID from the NOC…"
  hostname: "cafe-downtown-01"
  auth_secret: "…Auth Key from the NOC…"
  manager:
    host: "manager.example.com"   # must match the server certificate
    port: 9090
    reconnect_interval: 5
    heartbeat_interval: 30

dhcp:
  interface: "eth1"               # LAN side
  server_ip: "10.10.0.1"

radius:
  bind: "0.0.0.0:1812"

firewall:
  lan_interface: "eth1"
  wan_interface: "eth0"           # masqueraded uplink

tls:
  enabled: true
  ca_cert: "/etc/urufi/agent/manager-ca.pem"
  server_name: "manager.example.com"

logging:
  level: "info"
Keep the config private
config.yaml holds the agent's auth secret. Restrict it: sudo chmod 600 /etc/urufi/agent/config.yaml.
You can change the interfaces later from the NOC — these are just the first-run seeds.
6. Start and verify
sudo systemctl enable --now urufi-agent
journalctl -u urufi-agent -f
The agent connects to the Manager and, in the NOC, turns online. Then enable its services from the agent's panel — DHCP, RADIUS, EAP-TLS, firewall — and, for secure WiFi, initialize the tenant EAP certificate authority. The Manager pushes the EAP server certificate, client CA and CRL down automatically.
| Check | Command | Expected |
|---|---|---|
| Service running | systemctl status urufi-agent | active (running) |
| Connected to Manager | journalctl -u urufi-agent -e | registration + heartbeat lines |
| IP forwarding on | sysctl net.ipv4.ip_forward | = 1 |
| Walled garden loaded | sudo nft list ruleset | URUFI tables present |
| Client gets a lease | join the open SSID | address from the site pool + captive portal |
7. Point the access point at the agent (secure SSID)
Access happens over two SSIDs:
- Open SSID — the captive-portal network. The access point just bridges it to the agent's LAN; no RADIUS is involved.
- Secure SSID — WPA2/WPA3-Enterprise (802.1X). The Edge Agent is the RADIUS server, so the access point authenticates devices against the agent.
To wire up the secure SSID:
- In the NOC, register the access point as a RADIUS client (NAS) and set a shared secret.
- On the access point, create the secure SSID as WPA2/WPA3-Enterprise and set:
| Setting | Value |
|---|---|
| RADIUS server | the agent's LAN IP (the dhcp.server_ip from the config) |
| RADIUS port | 1812 |
| Shared secret | the value you set in the NOC |
Devices authenticate with EAP-TLS using the per-device certificate they downloaded from the captive portal. The agent's RADIUS verifies each certificate against the tenant's certificate authority — there is no shared WiFi password.
Order of operations
A device gets its certificate from the captive portal on the open SSID first, then joins the secure SSID. Bring the open SSID up before enabling the secure SSID.
8. Upgrades
The agent is a single binary, and its configuration is untouched by upgrades:
sudo install -m 0755 urufi-agent /usr/local/bin/urufi-agent
sudo systemctl restart urufi-agent
Roll back by restoring the previous binary and restarting. See the System Overview for how the agent fits into the platform.